


Nowadays, in-app ads are the most popular app monetization method there is. So we figured you ought to know how to integrate Facebook ads in your app.That’s why we’ve put together this simple how-to blog post. Just follow these simple steps and you’ll be getting that ad revenue in no time!
Initial Steps for Facebook Ads Integration
Step 1: Create a Facebook Audience Network Account
The first thing you need to do is to create a Facebook Audience Network account with your Facebook account.
Step 2: Create App Property in Your FAN Account
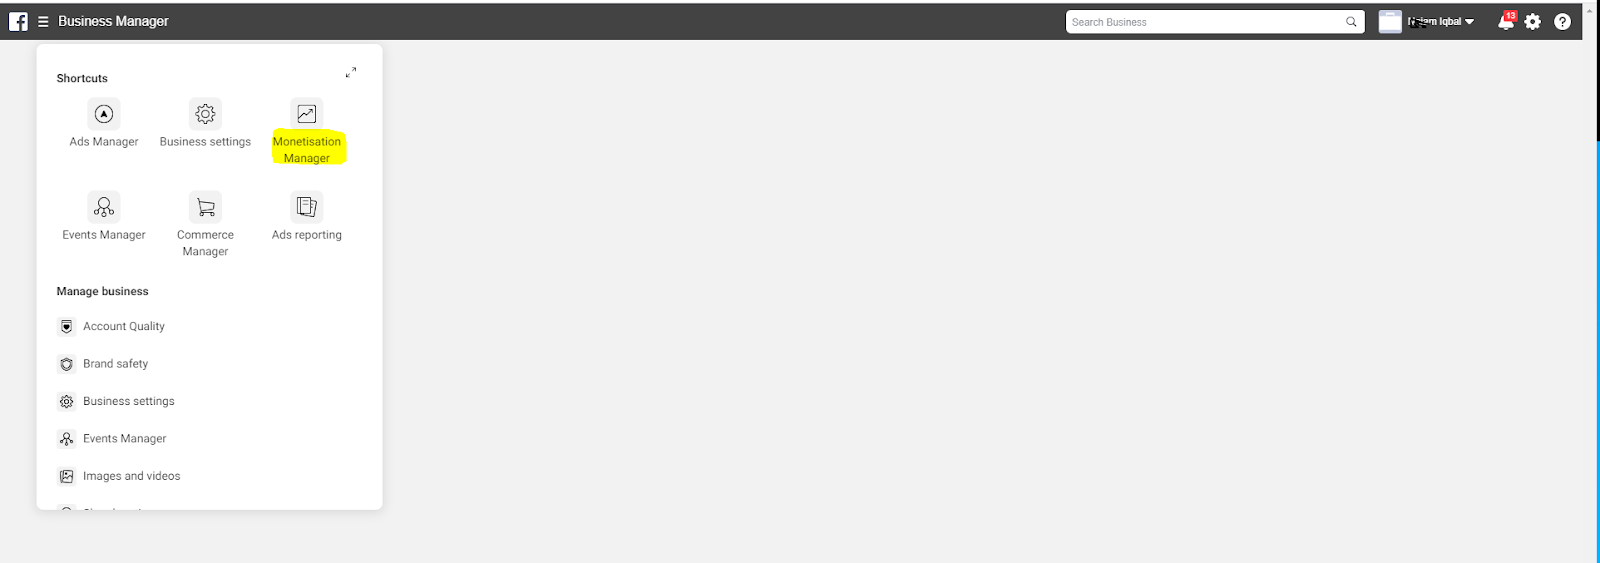
After creating a Facebook Audience Network account, click on the “≡” icon. Then select Monetisation Manager in your account.
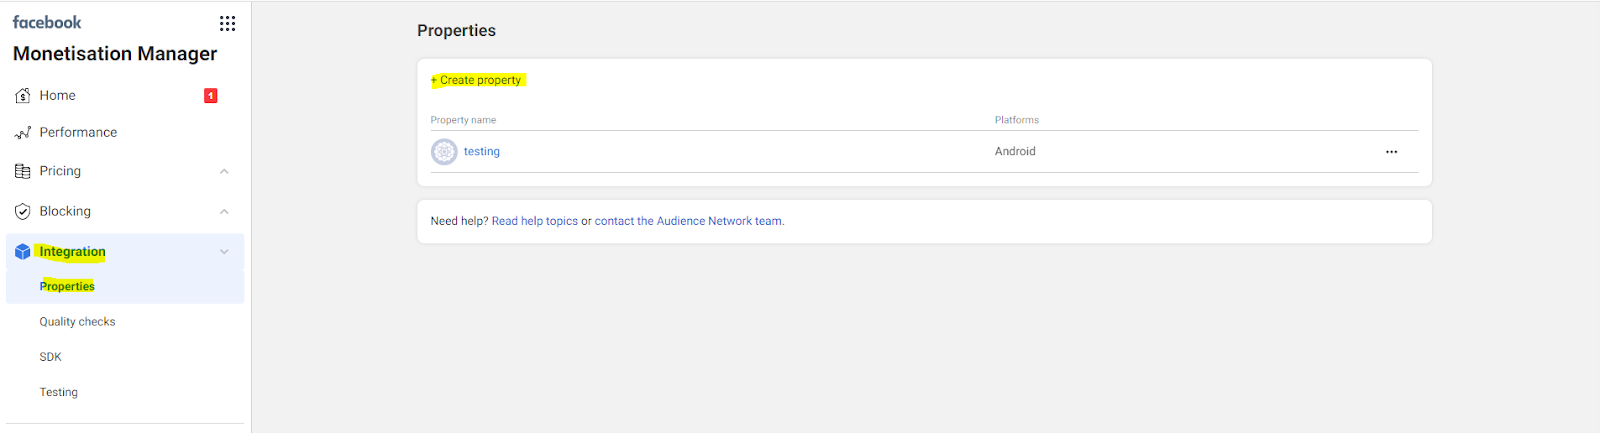
- Click on Integration;
Then click on Properties;
And then create an App Property.
- Enter your App Name;
Create a property;
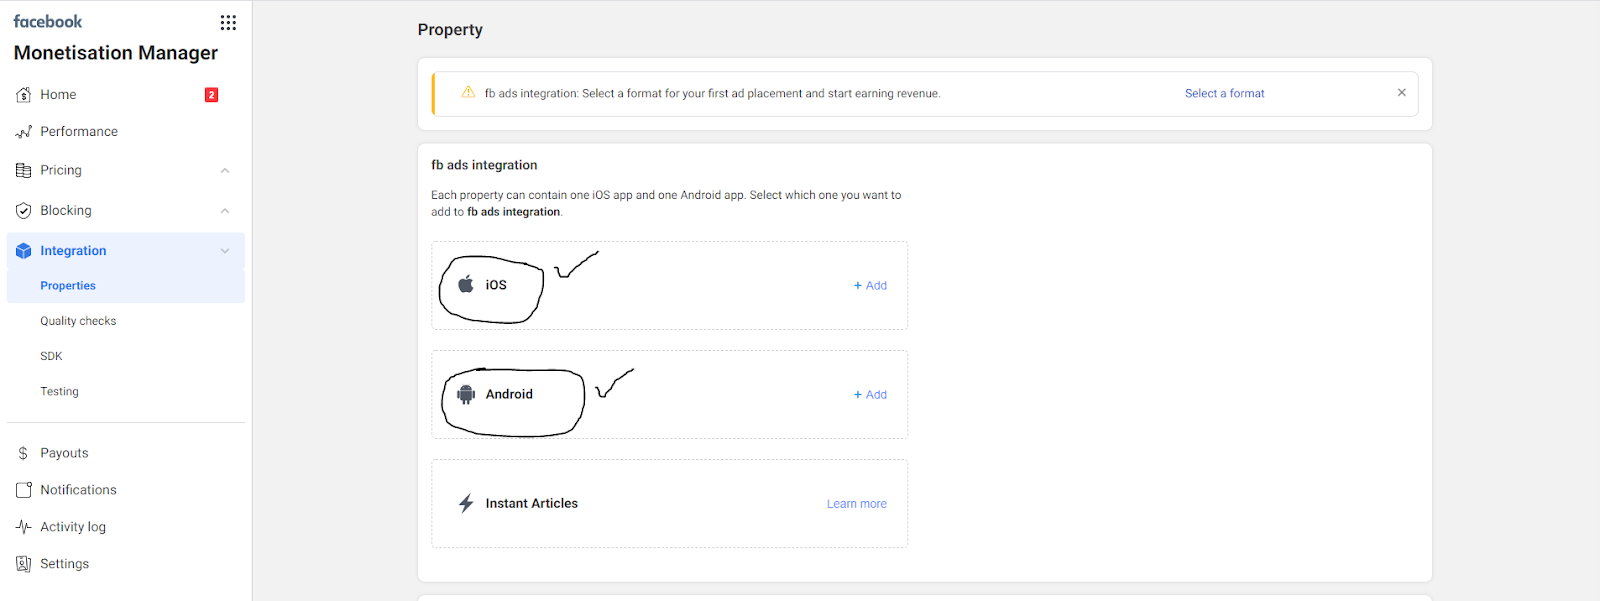
Select the App Platform – Android or iOS.
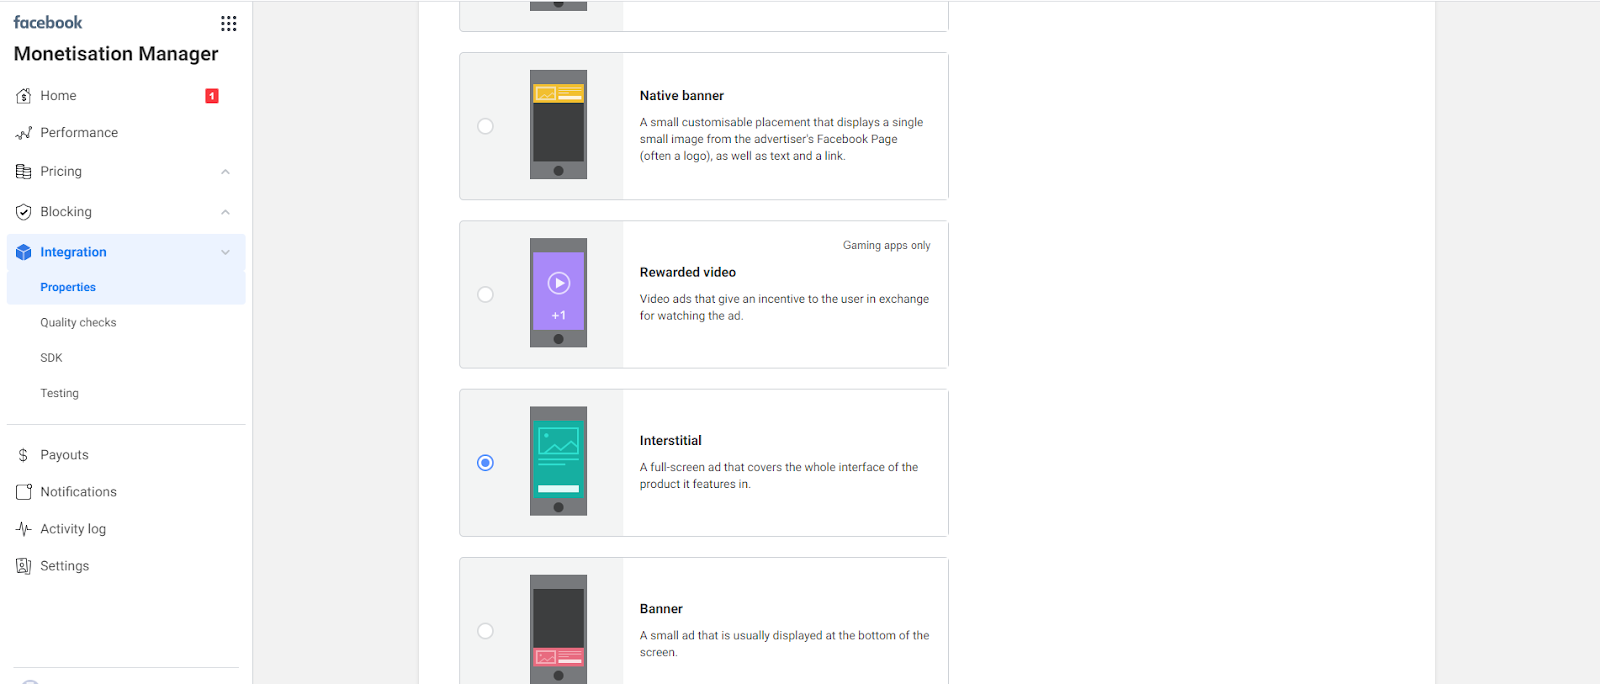
Step 3: Create Ad Types
Select the ad type and create your first ad.
Currently, it takes Facebook 1-2 days to review your app and approve it for ads. After that, you can create an Android or iOS project to integrate ads into your app.
Facebook Ads Integration for Android
Step 1: Create a New Project
You create a new project by clicking:
- File
- New
- New Project
Step 2: Integrate the Facebook SDK
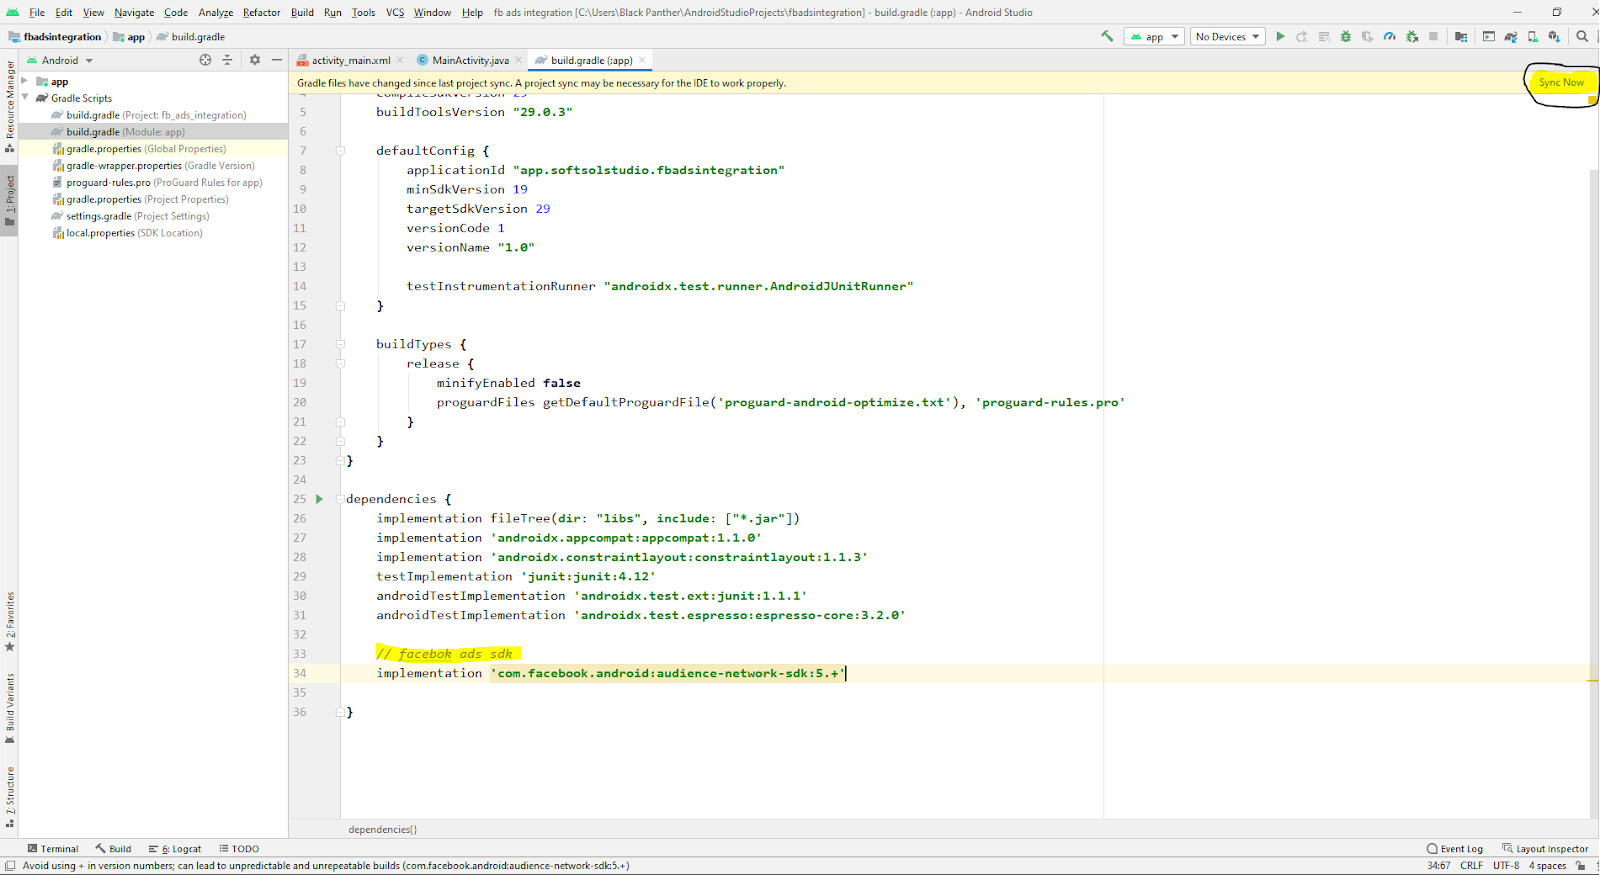
Add the following dependence in build.gradle (Module app) level file.
[java]
// facebook ads sdk
implementation ‘com.facebook.android:audience-network-sdk:5.9.1’
[/java]
Adding Banner Ads to Your Android App
After Facebook SDK integration:
- Go to the XML file;
- Add Banner Ads Layout;
- Implement it in the java file;
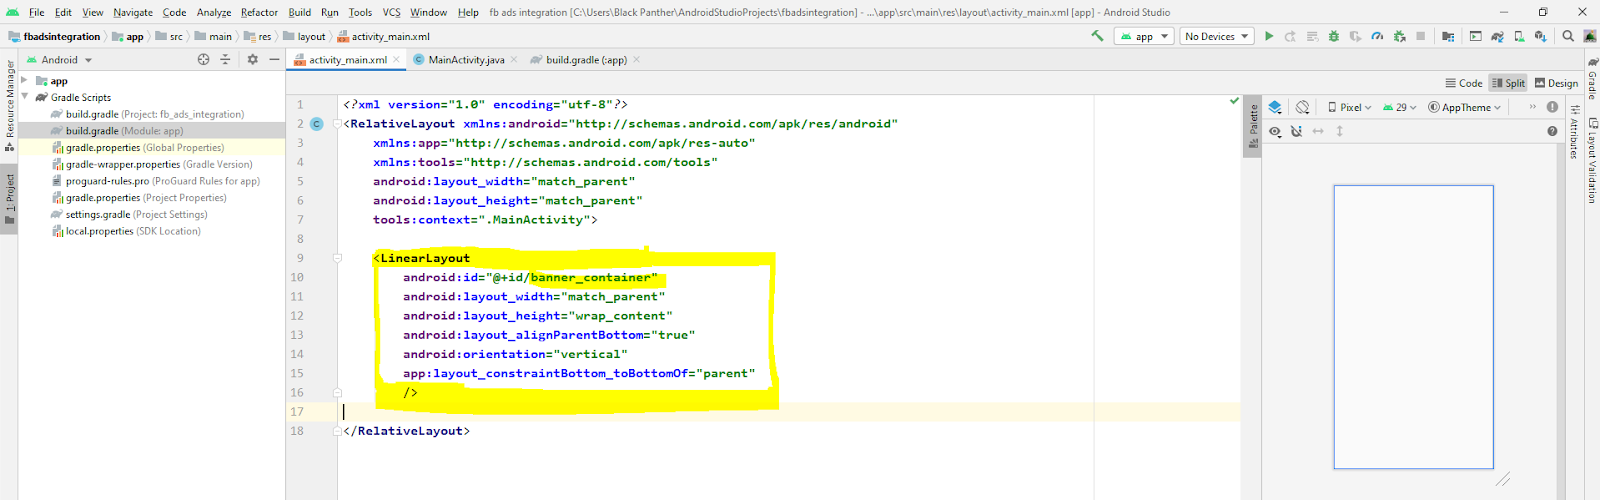
- Add the following code into the XML file:
[xml]
<?xml version=”1.0″ encoding=”utf-8″>;
<RelativeLayout xmlns:android=”https://schemas.android.com/apk/res/android”
xmlns:app=”https://schemas.android.com/apk/res-auto”
xmlns:tools=”https://schemas.android.com/tools”
android:layout_width=”match_parent”
android:layout_height=”match_parent”
tools:context=”.MainActivity”>;
<LinearLayout
android:id=”@+id/banner_container”
android:layout_width=”match_parent”
android:layout_height=”wrap_content”
android:layout_alignParentBottom=”true”
android:orientation=”vertical”
app:layout_constraintBottom_toBottomOf=”parent”
/>;
</RelativeLayout>;
[/xml]
- Go to your JAVA Activity;
- Implement the Banner ad;
- Instantiate an AdView object;
- Add the following code in OnCreate:
[java]
adView = new AdView(this, “IMG_16_9_APP_INSTALL#2029572424039676_2029575434039375”, AdSize.BANNER_HEIGHT_50);
// Find the Ad Container
LinearLayout adContainer = (LinearLayout) findViewById(R.id.banner_container);
adContainer.addView(adView);
// Request an ad
adView.loadAd();
[/java]
Add the following code to your activity’s onDestroy() function. This is done to release resources the AdView uses:
[java]
@Override
protected void onDestroy() {
if (adView != null) {
adView.destroy();
}
super.onDestroy();
}
[/java]
Then complete the Activity Code.
[java]
public class MainActivity extends AppCompatActivity implements AdListener{
private AdView adView;
@Override
protected void onCreate(Bundle savedInstanceState) {
super.onCreate(savedInstanceState);
setContentView(R.layout.activity_main);
//Call this method for facebook banner ads
loadBannerAds();
}
private void loadBannerAds() {
// Instantiate an AdView object.
// NOTE: The placement ID from the Facebook Monetization Manager identifies your App.
// for test ads, you can add IMG_16_9_APP_INSTALL# to your placement id. When your app is ready to serve real ads remove IMG_16_9_APP_INSTALL#.
adView = new AdView(this, “IMG_16_9_APP_INSTALL#2029572424039676_2029575434039375”, AdSize.BANNER_HEIGHT_50);
// Find the Ad Container
LinearLayout adContainer = (LinearLayout) findViewById(R.id.banner_container);
// Add the ad view to your activity layout
adContainer.addView(adView);
// Request an ad
adView.loadAd();
}
@Override
protected void onDestroy() {
if (adView != null) {
adView.destroy();
}
super.onDestroy();
}
@Override
public void onError(Ad ad, AdError adError) {
}
@Override
public void onAdLoaded(Ad ad) {
}
@Override
public void onAdClicked(Ad ad) {
}
@Override
public void onLoggingImpression(Ad ad) {
}
}
[/java]
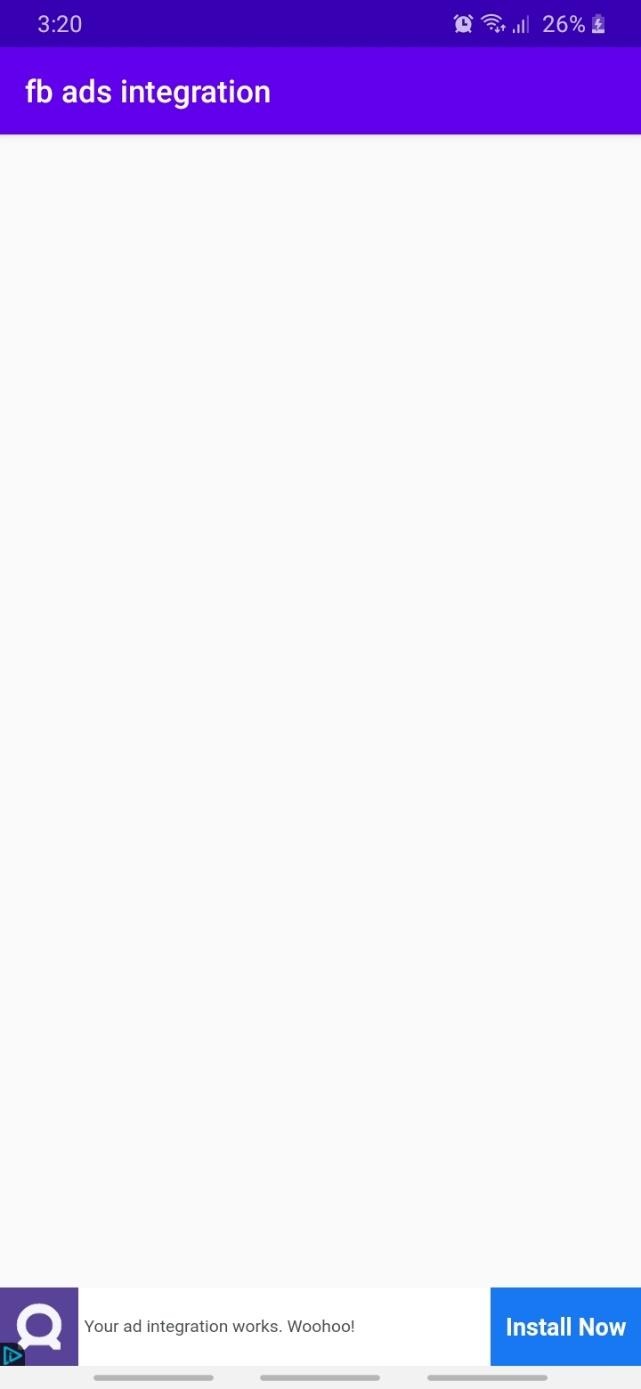
Once you run the above, you should see something like this:
Adding Interstitial Ads to Your Android App
Step 1
Initialize the Interstitial Ad.
Step 2
Add the following method into your java activity and call this method in onCreate.
(You can use this code, just make it fit your flow.)
Code:
[java]
private void loadIntertitialAd() {
// Instantiate an InterstitialAd object.
// NOTE: the placement ID will eventually identify this as your App, you can ignore it for
// now, while you are testing and replace it later when you have signed up.
// While you are using this temporary code only you will get test ads and if you release
// your code in Google Play like this, your users will not receive ads (you will get a “No Fill” error).
interstitialAd = new InterstitialAd(this, “IMG_16_9_APP_INSTALL#2029572424039676_2029575330706052”);
// Set listeners for the Interstitial Ad
interstitialAd.setAdListener(new InterstitialAdListener() {
@Override
public void onInterstitialDisplayed(Ad ad) {
// Interstitial ad displayed callback
Log.e(TAG, “Interstitial ad displayed.”);
}
@Override
public void onInterstitialDismissed(Ad ad) {
// Interstitial dismissed callback
Log.e(TAG, “Interstitial ad dismissed.”);
}
@Override
public void onError(Ad ad, AdError adError) {
// Ad error callback
Log.e(TAG, “Interstitial ad failed to load: ” + adError.getErrorMessage());
}
@Override
public void onAdLoaded(Ad ad) {
// Interstitial ad is loaded and ready to be displayed
Log.d(TAG, “Interstitial ad is loaded and ready to be displayed!”);
// Show the ad
interstitialAd.show();
}
@Override
public void onAdClicked(Ad ad) {
// Ad clicked callback
Log.d(TAG, “Interstitial ad clicked!”);
}
@Override
public void onLoggingImpression(Ad ad) {
// Ad impression logged callback
Log.d(TAG, “Interstitial ad impression logged!”);
}
});
// For autoplay video ads, it’s recommended to load the ad
// at least 30 seconds before it is shown
interstitialAd.loadAd();
}
Step 3
Add the following code to your Activity’s onDestroy() function to release resources the InterstitialAd uses:
Code:
@Override protected void onDestroy() {
if (interstitialAd != null) {
interstitialAd.destroy();
}
super.onDestroy();
}
[/java]
Step 4
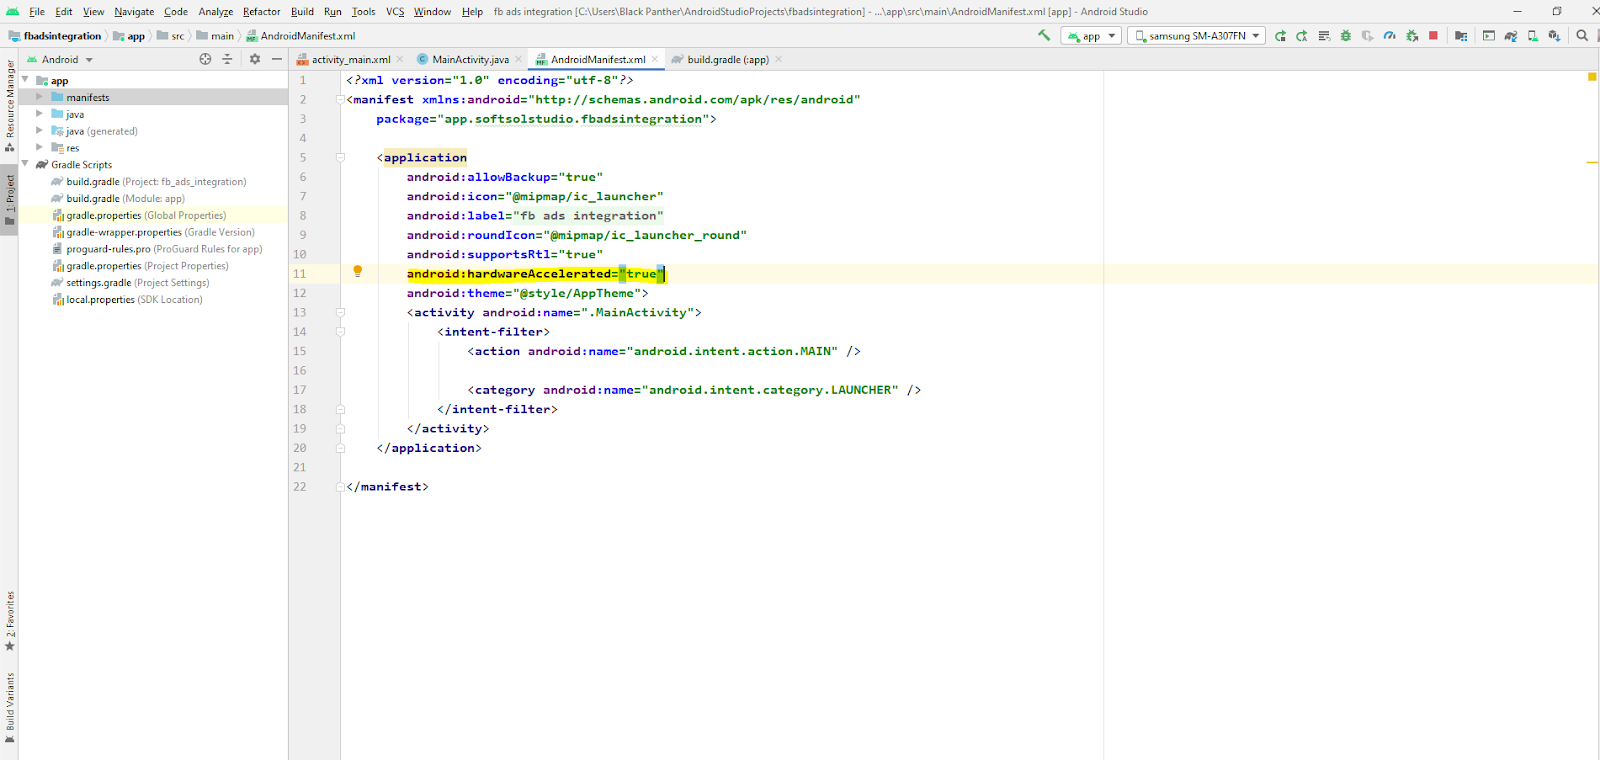
Open the manifest file and add the following attribute to the <application> tag. This will enable hardware acceleration for your app:
[java]
android:hardwareAccelerated=”true”
[/java]
Adding Native Ads to Your Android App
Step 1
Initialize native ads, native ad layout, and linear layout in your activity globally.
Code:
private NativeAdLayout nativeAdLayout;
private LinearLayout adView;
private NativeAd nativeAd;
Step 2
Call this method where you need to show the native ad.
Code:
[java]
private void loadNativeAd() {
nativeAd = new NativeAd(this, “IMG_16_9_APP_INSTALL#2029572424039676_2029573867372865”);
nativeAd.setAdListener(new NativeAdListener() {
@Override
public void onMediaDownloaded(Ad ad) {
}
@Override
public void onError(Ad ad, AdError adError) {
}
@Override
public void onAdLoaded(Ad ad) {
// Race condition, load() called again before last ad was displayed
if (nativeAd == null || nativeAd != ad) {
return;
}
// Inflate Native Ad into Container
inflateAd(nativeAd);
}
@Override
public void onAdClicked(Ad ad) {
}
@Override
public void onLoggingImpression(Ad ad) {
}
});
// Request an ad
nativeAd.loadAd();
}
private void inflateAd(NativeAd nativeAd) {
nativeAd.unregisterView();
// Add the Ad view into the ad container.
nativeAdLayout = findViewById(R.id.native_ad_container);
LayoutInflater inflater = LayoutInflater.from(MainActivity.this);
// Inflate the Ad view. The layout referenced should be the one you created in the last step.
adView1 = (LinearLayout) inflater.inflate(R.layout.native_ad_layout_1, nativeAdLayout, false);
nativeAdLayout.addView(adView1);
// Add the AdOptionsView
LinearLayout adChoicesContainer = findViewById(R.id.ad_choices_container);
AdOptionsView adOptionsView = new AdOptionsView(MainActivity.this, nativeAd, nativeAdLayout);
adChoicesContainer.removeAllViews();
adChoicesContainer.addView(adOptionsView, 0);
// Create native UI using the ad metadata.
AdIconView nativeAdIcon = adView1.findViewById(R.id.native_ad_icon);
TextView nativeAdTitle = adView1.findViewById(R.id.native_ad_title);
MediaView nativeAdMedia = adView1.findViewById(R.id.native_ad_media);
TextView nativeAdSocialContext = adView1.findViewById(R.id.native_ad_social_context);
TextView nativeAdBody = adView1.findViewById(R.id.native_ad_body);
TextView sponsoredLabel = adView1.findViewById(R.id.native_ad_sponsored_label);
Button nativeAdCallToAction = adView1.findViewById(R.id.native_ad_call_to_action);
// Set the Text.
nativeAdTitle.setText(nativeAd.getAdvertiserName());
nativeAdBody.setText(nativeAd.getAdBodyText());
nativeAdSocialContext.setText(nativeAd.getAdSocialContext());
nativeAdCallToAction.setVisibility(nativeAd.hasCallToAction() ? View.VISIBLE : View.INVISIBLE);
nativeAdCallToAction.setText(nativeAd.getAdCallToAction());
sponsoredLabel.setText(nativeAd.getSponsoredTranslation());
// Create a list of clickable views
List<View> clickableViews = new ArrayList<>();
clickableViews.add(nativeAdTitle);
clickableViews.add(nativeAdCallToAction);
// Register the Title and CTA button to listen for clicks.
nativeAd.registerViewForInteraction(
adView1,
nativeAdMedia,
nativeAdIcon,
clickableViews);
}
[/java]
Step 3
Add the following line in the required XML file for displaying the native ad.
Code:
[xml]
<com.facebook.ads.NativeAdLayout
android:id=”@+id/native_ad_container”
android:layout_width=”match_parent”
android:layout_alignParentTop=”true”
android:layout_height=”wrap_content”
android:orientation=”vertical” />;
[/xml]

Step 4
Go to
Res;
Layout;
Right click;
Create new resource file;
Add the following code:
Code:
[xml]
<xml version=”1.0″ encoding=”utf-8″>;
<LinearLayout xmlns:android=”https://schemas.android.com/apk/res/android”
android:id=”@+id/ad_unit”
android:layout_width=”match_parent”
android:layout_height=”wrap_content”
android:background=”@android:color/white”
android:orientation=”vertical”
android:paddingLeft=”10dp”
android:paddingRight=”10dp”>;
<LinearLayout
android:layout_width=”match_parent”
android:layout_height=”wrap_content”
android:orientation=”horizontal”
android:paddingBottom=”10dp”
android:paddingTop=”10dp”>;
<com.facebook.ads.AdIconView
android:id=”@+id/native_ad_icon”
android:layout_width=”35dp”
android:layout_height=”35dp” />;
<LinearLayout
android:layout_width=”wrap_content”
android:layout_height=”wrap_content”
android:orientation=”vertical”
android:paddingLeft=”5dp”
android:paddingRight=”5dp”>;
<TextView
android:id=”@+id/native_ad_title”
android:layout_width=”wrap_content”
android:layout_height=”wrap_content”
android:ellipsize=”end”
android:lines=”1″
android:textColor=”@android:color/black”
android:textSize=”15sp” />;
<TextView
android:id=”@+id/native_ad_sponsored_label”
android:layout_width=”wrap_content”
android:layout_height=”wrap_content”
android:ellipsize=”end”
android:lines=”1″
android:textColor=”@android:color/darker_gray”
android:textSize=”12sp” />;
</LinearLayout>;
<LinearLayout
android:id=”@+id/ad_choices_container”
android:layout_width=”match_parent”
android:layout_height=”wrap_content”
android:gravity=”end”
android:orientation=”horizontal” />;
</LinearLayout>;
<com.facebook.ads.MediaView
android:id=”@+id/native_ad_media”
android:layout_width=”match_parent”
android:layout_height=”300dp”
android:gravity=”center” />;
<LinearLayout
android:layout_width=”match_parent”
android:layout_height=”wrap_content”
android:orientation=”horizontal”
android:padding=”5dp”>;
<LinearLayout
android:layout_width=”wrap_content”
android:layout_height=”wrap_content”
android:layout_weight=”3″
android:orientation=”vertical”>;
<TextView
android:id=”@+id/native_ad_social_context”
android:layout_width=”match_parent”
android:layout_height=”wrap_content”
android:ellipsize=”end”
android:lines=”1″
android:textColor=”@android:color/darker_gray”
android:textSize=”12sp” />;
<TextView
android:id=”@+id/native_ad_body”
android:layout_width=”match_parent”
android:layout_height=”wrap_content”
android:ellipsize=”end”
android:gravity=”center_vertical”
android:lines=”2″
android:textColor=”@android:color/black”
android:textSize=”12sp” />;
</LinearLayout>;
<Button
android:id=”@+id/native_ad_call_to_action”
android:layout_width=”100dp”
android:layout_height=”30dp”
android:layout_gravity=”center_vertical”
android:layout_weight=”1″
android:background=”#4286F4″
android:paddingLeft=”3dp”
android:paddingRight=”3dp”
android:textColor=”@android:color/white”
android:textSize=”12sp”
android:visibility=”gone” />;
</LinearLayout>;
</LinearLayout>;
[/xml]
If you run the above code, a live native ad will be displayed in your app.
Here’s a screenshot from a demo app.

Facebook Ads Integration for iOS
Step 1
Create Project;
Open Xcode;
Create Project;
Single View App;
Enter the project name;
Press Next;
Select the project location;
Press Enter.

Step 2
Install SDKs:
Open terminal;
Type cd + project path;
Press Enter;
Type pod init;
Press Enter;
Now the pod will be created;
Open pod;
Write this line, save the file pod “FBAudienceNetwork”;
Now open the terminal from the previous state again;
Type pod install;
Press Enter.
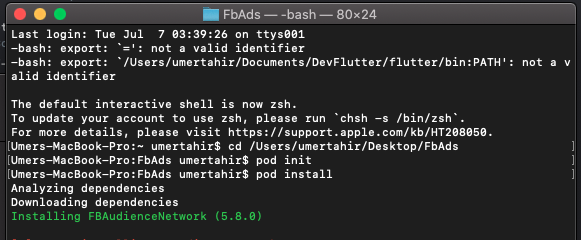
The installation part is now done. Let’s start coding.
Adding Banner Ads to Your iOS App
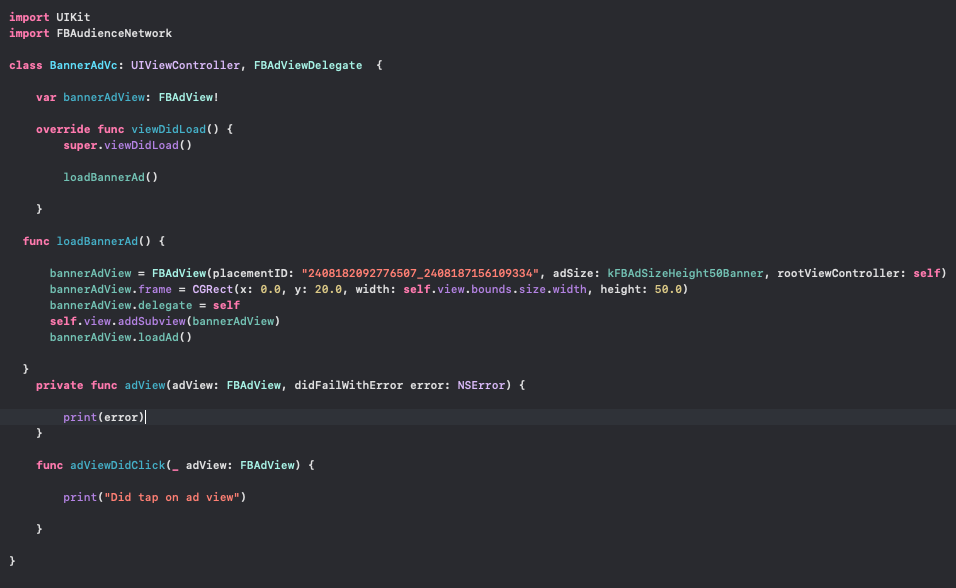
Step 1
Create a new ViewController BannerAdVc;
Extend with FBAdViewDelegate;
Create a property for bannerAdView.
You can see a screenshot below.
[java]
class BannerAdVc : UIViewController, FBAdViewDelegate {
var bannerAdView: FBAdView!
}
[/java]
Step 2
Create a loadBannerAd method in which we will set up and load banner ads.
Replace Placemend_ID with your ID.
Code:
[java]
func loadBannerAd() {
bannerAdView = FBAdView(placementID: “2408182092776507_2408187156109334”, adSize: kFBAdSizeHeight50Banner, rootViewController: self)
bannerAdView.frame = CGRect(x: 0.0, y: 20.0, width: self.view.bounds.size.width, height: 50.0)
bannerAdView.delegate = self
self.view.addSubview(bannerAdView)
bannerAdView.loadAd()
}
[/java]
Step 3
Now add the delegate method of a banner ad that will handle callbacks.
Code:
[java]
func adView(adView: FBAdView, didFailWithError error: NSError) {
print(error)
}
func adViewDidClick(adView: FBAdView) {
print(“Did tap on ad view”)
}
[/java]

Adding Interstitial Ads to Your iOS App
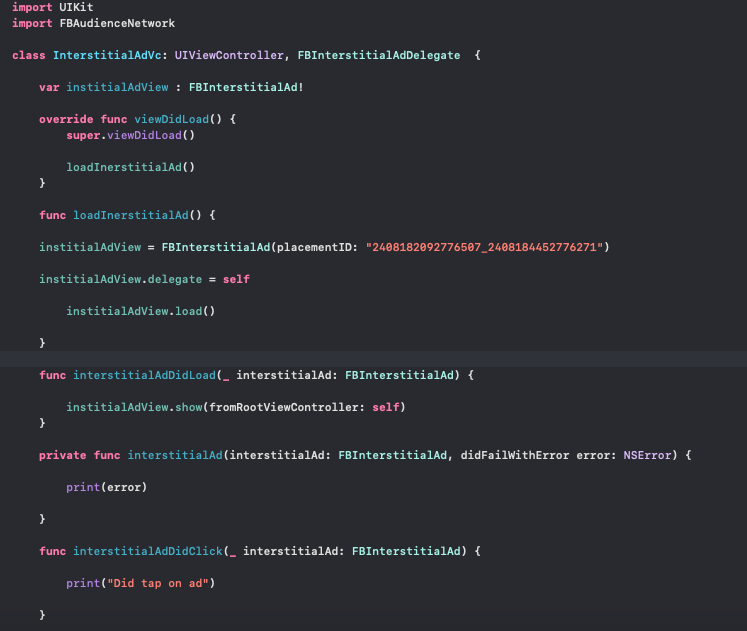
Step 1
Create a new ViewController with the name InterstitialAdVc;
Extend with FBInterstitialAdDelegate;
Create a property for interstitialad.
You can see a screenshot below.
[java]
class InterstitialAdVc: UIViewController, FBInterstitialAdDelegate {
var institialAdView : FBInterstitialAd!
}
Step 2
Now create a method to set up and load institialad;
Replace placement_id with your ID;
Call this function in viewDidLoad().
Code:
func loadInerstitialAd() {
institialAdView = FBInterstitialAd(placementID: “2408182092776507_2408184452776271”)
institialAdView.delegate = self
institialAdView.loadAd()
}
[/java]
Step 3
Now add the delegate method of the FBInterstitialAdDelegate to handle callbacks.
[java]
func interstitialAdDidLoad(interstitialAd: FBInterstitialAd) {
institialAdView.showAdFromRootViewController(self)
}
func interstitialAd(interstitialAd: FBInterstitialAd, didFailWithError error: NSError) {
print(error)
}
func interstitialAdDidClick(interstitialAd: FBInterstitialAd) {
print(“Did tap on ad”)
}
func interstitialAdDidClose(interstitialAd: FBInterstitialAd) {
print(“Did close ad”)
}
[/java]

Adding Native Ads to Your iOS App
Step 1
Open view controller;
Import FBAudienceNetwork library;
Extend ViewController from FBNativeAdDelegate.
You can see a screenshot below.
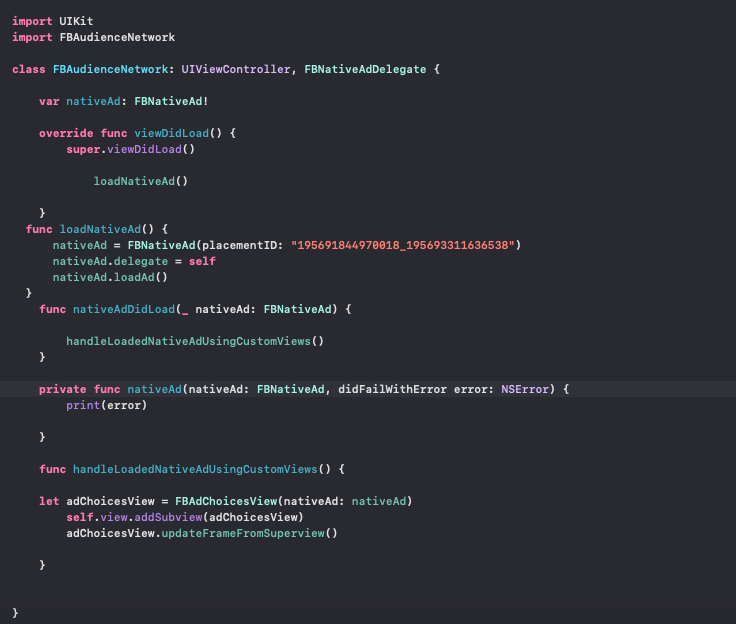
Step 2
Create two variables:
var nativeAd: FBNativeAd!
Now we need to load the FBNativeAd. Let’s create a function.
In this function, you need to pass placementId which you can get from the Facebook account that you’ve already created above. And call loadNativeAd function in viewDidload method.
Code:
[java]
func loadNativeAd() {
nativeAd = FBNativeAd(placementID: “195691844970018_195693311636538”)
nativeAd.delegate = self
nativeAd.loadAd()
}
[/java]
Step 3
Now add the delegate method of an FBNativeAd that will handle callbacks.
[java]
func nativeAdDidLoad(nativeAd: FBNativeAd) {
handleLoadedNativeAdUsingCustomViews()
}
func nativeAd(nativeAd: FBNativeAd, didFailWithError error: NSError) {
print(error)
}
func handleLoadedNativeAdUsingCustomViews() {
// Set the ad title.
let adChoicesView = FBAdChoicesView(nativeAd: nativeAd)
viewAdContainer.addSubview(adChoicesView)
adChoicesView.updateFrameFromSuperview()
}
[/java]

Conclusion
Well, there you have it.
Now you have all the knowledge you need to start using Facebook ads in your apps.
Did we miss anything? What would you like to read about next?
Let us know in the comments below.


